WordPress Plugin Template
A robust and GPL-licensed code template for creating a standards-compliant WordPress plugin.
Why this template?
After writing many WordPress plugins I slowly developed my own coding style and way of doing things – this template is the culmination of what I’ve learnt along the way. I use this template as a base for any plugin that I start building and I thought it might benefit more people if I shared it around.
How do I use it?
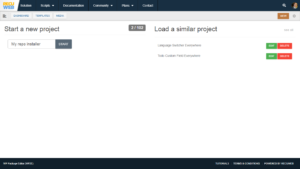
You can simply copy the files out of this repo and rename everything as you need it, but to make things easier you can start a new project and follow the build process.
API functions
As of v3.0 of this template, there are a few libraries built into it that will make a number of common tasks a lot easier. I will expand on these libraries in future versions.
Registering a new post type
Using the post type API and the wrapper function from the main plugin class you can easily register new post types with one line of code. For example if you wanted to register a listing post type then you could do it like this:
WordPress_Plugin_Template()->register_post_type( 'listing', __( 'Listings', 'wordpress-plugin-template' ), __( 'Listing', 'wordpress-plugin-template' ) );
Note that the WordPress_Plugin_Template() function name and the wordpress-plugin-template text domain will each be unique to your plugin after you have used the cloning script.
This will register a new post type with all the standard settings. If you would like to modify the post type settings you can use the {$post_type}_register_args filter. See the WordPress codex page for all available arguments.
Registering a new taxonomy
Using the taxonomy API and the wrapper function from the main plugin class you can easily register new taxonomies with one line of code. For example if you wanted to register a location taxonomy that applies to the listing post type then you could do it like this:
WordPress_Plugin_Template()->register_taxonomy( 'location', __( 'Locations', 'wordpress-plugin-template' ), __( 'Location', 'wordpress-plugin-template' ), 'listing' );
Note that the WordPress_Plugin_Template() function name and the wordpress-plugin-template text domain will each be unique to your plugin after you have used the cloning script.
This will register a new taxonomy with all the standard settings. If you would like to modify the taxonomy settings you can use the {$taxonomy}_register_args filter. See the WordPress codex page for all available arguments.
Defining your Settings Page Location
Using the filter {base}menu_settings you can define the placement of your settings page. Set the location key to options, menu or submenu. When using submenu also set the parent_slug key to your preferred parent menu, e.g themes.php. For example use the following code to let your options page display under the Appearance parent menu.
$settings['location'] = 'submenu';
$settings['parent_slug'] = 'themes.php';
See respective codex pages for location option defined below:
- https://codex.wordpress.org/Function_Reference/add_options_page
- https://developer.wordpress.org/reference/functions/add_menu_page/
- https://developer.wordpress.org/reference/functions/add_submenu_page/
Calling your Options
Using the Settings API and the wrapper function from the main plugin class you can easily store options from the WP admin like text boxes, radio options, dropdown, etc. You can call the values by using id that you have set under the settings_fields function. For example you have the id – text_field, you can call its value by using get_option('wpt_text_field'). Take note that by default, this plugin is using a prefix of wpt_ before the id that you will be calling, you can override that value by changing it under the __construct function $this->base variable;
What does this template give me?
This template includes the following features:
- Plugin headers as required by WordPress & WordPress.org
- Readme.txt file as required by WordPress.org
- Main plugin class
- Full & minified Javascript files
- Grunt.js support
- Standard enqueue functions for the dashboard and the frontend
- A library for easily registering a new post type
- A library for easily registering a new taxonomy
- A library for handling common admin functions (including adding meta boxes to any post type, displaying settings fields and display custom fields for posts)
- A complete and versatile settings class
- A .pot file to make localisation easier
- Full text of the GPLv2 license
I’ve got an idea/fix for the template
If you would like to contribute to this template then please fork it and send a pull request. Please submit all pull requests to the develop branch. I’ll merge the request if it fits into the goals for the template and credit you in the changelog.
Setup a Dev environment
After filling the plugin information and settings, deploy the Boilerplate script and its dependencies in a dev environment following these steps:
1 – Make sure you keep the “Installer” option checked when downloading the archive from the previous steps.
2 – Install the plugin package installer locally and activate the plugin from the list.
3 – Click the new “Dependencies & Licenses” link under the section Plugins of the admin dashboard. You should see 3 elements:
- the activated WP Boilerplate Installer (#id)
- the actual Boilerplate Script named with your project title
- other dependencies previously selected via the WP2E panel
4 – Install and activate all missing scripts.
- Give a name to your project
- Download the Installer Package
- Install & activate the plugin locally
- Install the suggested dependencies
Note: The package installer can be deleted once all dependencies are successfully installed


